
一、安装openresty
(一)编译安装
yum install pcre-devel openssl-devel gcc curl
wget https://openresty.org/download/openresty-1.15.8.2.tar.gz
tar -xzvf openresty-1.15.8.2.tar.gz
cd openresty-1.15.8.2
./configure --prefix=/opt/openresty --with-luajit --with-http_ssl_module
make&&make install
(二)yum安装
1、在 CentOS 系统中添加 openresty 仓库。
yum install -y yum-utils yum-config-manager --add-repo https://openresty.org/package/centos/openresty.repo
yum install -y openresty
二、配置waf防火墙
(一)上传waf
上传waf文件到openresty的nginx目录(/usr/local/openresty/nginx/conf/)中,waf文件用途如下:
init.lua # 规则函数
waf.lua # 逻辑关系
# wafconf # 正则匹配关系目录
wafconf/args # 里面的规则get参数进行过滤的
wafconf/url # 是只在get请求url过滤的规则
wafconf/post # 是只在post请求过滤的规则
wafconf/whitelist # 是白名单,里面的url匹配到不做过滤
wafconf/user-agent # 是对user-agent的过滤规则
(二)配置waf信息
按实际情况修改waf规则文件目录和日志目录。
vim /usr/local/openresty/nginx/conf/waf/config.lua
RulePath = "/usr/local/openresty/nginx/conf/waf/wafconf/"
attacklog="on"
logdir = "/www/wwwlogs/waf/"
UrlDeny="on"
Redirect="on"
CookieMatch="on"
postMatch="on"
whiteModule="on"
black_fileExt={"php","jsp"}
ipWhitelist={"127.0.0.1"},{"127.0.0.2"}
ipBlocklist={"1.0.0.1"}
CCDeny="on"
CCrate="300/60"
2、配置文件说明:
RulePath = “/usr/local/openresty/nginx/conf/waf/waf/wafconf/” –规则存放目录
attacklog = “off” –是否开启攻击信息记录,需要配置
logdir logdir = “/usr/local/nginx/logs/hack/” –log存储目录,该目录需要用户自己新建,切需要nginx用户的可写权限
UrlDeny=”on” –是否拦截url访问
Redirect=”on” –是否拦截后重定向
CookieMatch = “on” –是否拦截cookie攻击
postMatch = “on” –是否拦截post攻击
whiteModule = “on” –是否开启URL白名单
black_fileExt={“php”,”jsp”} –填写不允许上传文件后缀类型
ipWhitelist={“127.0.0.1”} –ip白名单,多个ip用逗号分隔
ipBlocklist={“1.0.0.1″} –ip黑名单,多个ip用逗号分隔
CCDeny=”on” –是否开启拦截cc攻击(需要nginx.conf的http段增加lua_shared_dict limit 10m;)
CCrate = “100/60” –设置cc攻击频率,单位为秒. –默认1分钟同一个IP只能请求同一个地址100次
html=[[Please go away~~]] –警告内容,可在中括号内自定义
备注:不要乱动双引号,区分大小写
(三)新建lua启动配置文件
vim /usr/local/openresty/nginx/conf/lua.conf
写入如下内容(文件路径为第二条中上传目录,按实际情况修改):
lua_shared_dict limit 10m;
lua_package_path "/usr/local/openresty/nginx/conf/waf/?.lua";
init_by_lua_file  /usr/local/openresty/nginx/conf/waf/init.lua;
access_by_lua_file /usr/local/openresty/nginx/conf/waf/waf.lua;
(四)修改nginx.conf使lua启动
vim /usr/local/openresty/nginx/conf/nginx.conf
1、在http段加入“include lua.conf;”,并启动openresty:
http {

  include mime.types;
  default_type application/octet-stream;
  sendfile on;
  keepalive_timeout 65;
  include lua.conf;
  server {
          listen 8090;
/usr/loac/openresty/nginx/sbin/nginx -t
启动openresty:
/usr/loac/openresty/nginx/sbin/nginx
nginx: the configuration file /usr/local/openresty/nginx/conf/nginx.conf syntax is ok
nginx: configuration file /usr/local/openresty/nginx/conf/nginx.conf test is successful
[root@zhuruceshi conf]# /usr/local/openresty/nginx/sbin/nginx
nginx: [error] lua_load_resty_core failed to load the resty.core module from https://github.com/openresty/lua-resty-core; ensure you are using an OpenResty release from https://openresty.org/en/download.html (rc: 2, reason: module ‘resty.core’ not found:
no field package.preload[‘resty.core’]
no file ‘/usr/local/openresty/nginx/conf/waf/resty/core.lua’
no file ‘/usr/local/openresty/site/lualib/resty/core.so’
no file ‘/usr/local/openresty/lualib/resty/core.so’
no file ‘/usr/local/lib/lua/5.1/resty/core.so’
no file ‘/usr/local/openresty/luajit/lib/lua/5.1/resty/core.so’
no file ‘/usr/local/lib/lua/5.1/loadall.so’
no file ‘/usr/local/openresty/site/lualib/resty.so’
no file ‘/usr/local/openresty/lualib/resty.so’
no file ‘/usr/local/lib/lua/5.1/resty.so’
no file ‘/usr/local/openresty/luajit/lib/lua/5.1/resty.so’
no file ‘/usr/local/lib/lua/5.1/loadall.so’)
错误原因是找不到lualib库和resty模块,默认到/usr/local/lib/ 去找lualib,然而在编译安装OpenResty时lualib库默认放到/usr/local/openresty/lualib,可以做软连接解决。
ln -s /usr/local/openresty/lualib /usr/local/lib/lua
ln -s /usr/local/openresty/lualib/resty /usr/local/openresty/nginx/conf/waf/resty
ln -s /usr/local/openresty/lualib /usr/local/lib/lua
ln -s /usr/local/openresty/lualib/resty /www/service/lua/waf/
(五)测试效果
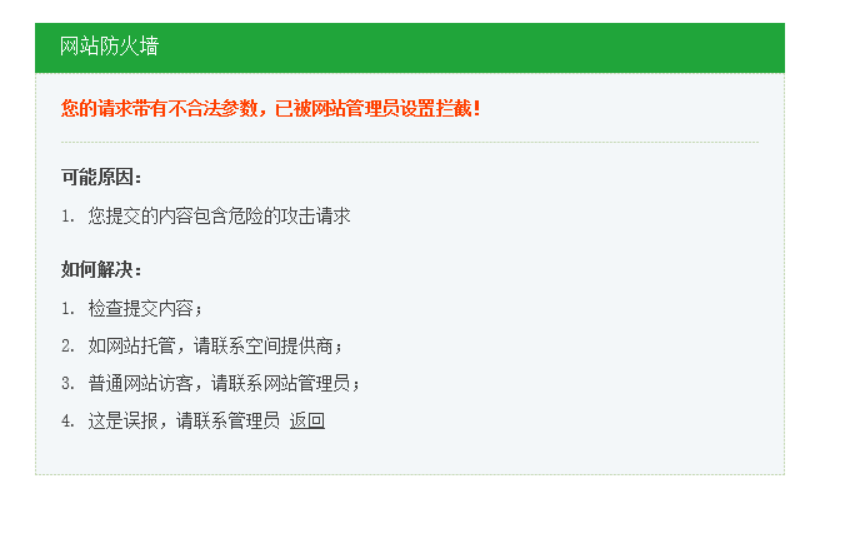
浏览器访问“http://192.168.1.*/?id=1 or 1=1”。出现阻止界面说明安装成功。
三、系统已安装ningx解决方案
如果系统已经安装了nginx,可以在系统中新装openresty。使用原nginx反向代理到openresty上。openresty配置好防护,并将运行目录指向项目路径。
(一)安装openresty
(二)利用新域名修改配置测试防护效果。
1、拷贝原nginx中项目配置文件到openresty配置目录。
cp /www/service/nginx/conf.d/xiangmu.conf /usr/loacl/openresty/nginx/conf.d/
vim /usr/loacl/openresty/nginx/conf/nginx.conf
server {
 listen 8080;
 server_name localhost;
 location / {
    root html;
    index index.html index.htm;
}
3、修改openresty中项目配置文件端口为8080,并启动openresty。
vim /usr/loacl/openresty/nginx/conf/conf.d/xiangmu.conf
4、新建域名openresty.xiaohesoft.com(或修改本地hosts文件),解析到项目ip,进行测试。
server {

   listen 8080;
   server_name localhost;
   location / {
      root html;
      index index.html index.htm;
}
将监听端口80接到访问信息转到openresty的8080端口。(用nginx反向代理到openresty时,配置代理的ip不能是localhost和127.0.0.1,需要是内网ip或外网ip,或删除白名单内本机ip。):
vim /www/service/nginx/conf.d/xiangmu.conf
server {
 listen 80;
 server_name openresty.yuming.com;
 location /{
     proxy_pass "http://127.0.0.1:8080";
     proxy_set_header X-Forwarded-For $remote_addr;
     #下面这行的作用是把原http请求的Header中的Host字段也放到转发的请求里。如果不加这一行的话,nginx转发的请求header里就不会有Host字段,而服务器是靠这个Host值来区分你请求的是哪个域名的资源的。
     proxy_set_header Host $host;
     #获取真实IP
     proxy_set_header X-Real-IP $remote_addr;

}
}
(2)修改openresty配置(其他配置不变),加入新server(复制原有配置修改域名),把openresty.yuming.com指向到项目
vim /usr/local/openresty/nginx/conf/conf.d/xiangmu.conf
server {
        listen       8080;
        server_name  openresty.xiaohesoft.com;
        index index.html index.htm index.php;
        root /alidata/www/pufaedu;
        location ~ .*\.(php|php5)?$
        {
                #fastcgi_pass  unix:/tmp/php-cgi.sock;
                fastcgi_pass  127.0.0.1:9000;
                fastcgi_index index.php;
                include fastcgi.conf;
        }
        location ~ ^/(\.user.ini|\.htaccess|\.git|\.sql|\.svn|\.project|LICENSE|README.md)
        {
                return 404;
        }
        location ~ .*\.(gif|jpg|jpeg|png|bmp|swf)$
        {
                expires 30d;
        }
        location ~ .*\.(js|css)?$
        {
                expires 1h;
        }
        access_log  off;#/alidata/log/nginx/access/pufaedu.log;
}
(三)测试效果
重启原nginx和openresty,使配置生效。用浏览器打开http://openresty.xiaohesoft.com进行测试。正常效果是可以顺利访问项目页面,在地址栏后加“?=../”访问时被网站防火墙拦截。

(四)修改配置使lua正式生效
1、测试通过后证明配置没问题,按本文(三、4.(1))的方法修改原nginx下项目配置文件,使用反向代理将访问请求转到openresty。
2、修改openresty下项目配置文件,指向项目录(将监听的80端口修改为8080)。
(五)验证效果
重启原nginx和openresty,使配置生效。用浏览器打开项目网址,正常效果是可以顺利访问项目页面,在地址栏后加“?=../”访问时被网站防火墙拦截。
(六)删除测试配置
1、原nginx项目配置文件中openresty.xiaohesoft.com产生的反向代理配置。
vim /usr/local/openresty/nginx/conf/conf.d/xiangmu.conf
2、openresty项目配置文件中新加关于openresty.xiaohesoft.com的server配置。
vim /usr/local/openresty/nginx/conf/conf.d/xiangmu.conf
规则修改
- ip访问黑白名单
vim /usr/local/openresty/nginx/conf/waf/config.lua
ipWhitelist={“127.0.0.1”} –ip白名单,多个ip用逗号分隔如{“127.0.0.1”} ,{“127.0.0.2”}
ipBlocklist={“1.0.0.1”} –ip黑名单,多个ip用逗号分隔如{“1.0.0.1”} ,{“1.0.0.2”}
- 误拦截修改
- 检查日志文件,查看被拦截是什么类型信息。
- 修改相应类型防护规则即可。
如:get规则/usr/local/openresty/nginx/conf/waf/wafconf/args